Monday 24 June 2013

Paint Doodler Change Background


Prerequisite

1. Basic understanding of paint doodler interface http://paintdoodler.blogspot.co.uk/p/paint-doodler-user-interface.html
2. For tutorials visit http://paintdoodler.blogspot.co.uk/2013/05/index.html

Steps

  1. Logon to paint doodler website by opening http://www.paintdoodler.com  in your browser. Login by clicking Facebook,Twitter, or Google + icons on the home page. You will be presented with a screen. showing text "The Paint Doodlder is Loading. Please visit some of the tutorials below while it loads..." followed by "Paint Doodler is Ready Click here to continue". Click on this text to start working on the app.
  2. Go to Menu item Image->Canvas to manage canvas.
  3. Change Canvas size, grid space and background using tool control options below the menu items as demonstrated in the video.
  4. To change the grid space eneter a numeric value in the text box next to "Grid Space".  
  5. To change grid color select a color from the color input next to grid space. 
  6. To remove grids remove the numeric value from the grid space text box or set it to 0.
  7. To change background color select background color and choose appropriate color from the color input.
  8. To make background transparent select Transparent option from the drop down.

Notes

  1.  You must click on an adjacent textbox to apply changes.
  2. All measurements are in pixel.
  3. Paint doodler canvas is bottom most layer. Grid space and grid color are moved when saving the image.
  4. Image can be saved by choosing menu File-> Save. All canvas layers will be merged from top to bottom. In order save to hard disk right click the generated image and choose "save image as".

How to use pen and brush on paint doodler


Prerequisite

1. Basic understanding of paint doodler interface http://paintdoodler.blogspot.co.uk/p/paint-doodler-user-interface.html

Setup Steps

  1. Logon to paint doodler website by opening http://www.paintdoodler.com  in your browser. Login by clicking Facebook,Twitter, or Google + icons on the home page. You will be presented with a screen. showing text "The Paint Doodlder is Loading. Please visit some of the tutorials below while it loads..." followed by "Paint Doodler is Ready Click here to continue". Click on this text to start working on the app.
  2. Select appropriate color from the color input box from the tool box.  Color box can be found at the bottom of the tool box.
  3. To start using brush choose following Brush tool icon from the tool Box.
  4. To start using pencil choose Pencil tool icon from the tool Box.
Brush Tool

Pencil Tool

Brush Tool Options and Steps

On choosing brush tool you are presented with following options in tool controls under menu.
  1. Brush Select box- This option allows you to choose various types of brush shapes 
    • Round
    • Square
    • Free Hand - When choosing this option you have an additional option of select brush length
    • Tube - This option is quite useful when you are trying to draw hair, grass etc. It uses Bézier curve to draw tube like structure along the stroke path.
  2. Opacity - This allows to choose the transparency level of the stroke. Opacity 100 means brush stoke is opaque. Opacity 0 means that brush stoke is completely transparent.
  3. Softness - This creates soft brush edges by creating a color gradient. Softness 0 mean that brush edges are of the same color as center of the brush. 100 means that brush edges are more transparent than the centre.
  4. Size - This helps in setting the size of the brush.
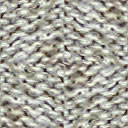
  5. Fill - You can apply texture (over 30), patterns(30) or create a stroke using stencils(over 10). You can select stencils, patterns and textures from your local file system. Stencil must have white background. Pattern and textures do not have any such limitation. Images used for patterns are blended with drawing. Images used for textures are applied over the draw transparency level of textures.
  6. To select local textures, patterns from local file system choose fill type from control menu. Make sure you must select none from the select option next to fill type. Use select file input to choose local image.
    Sample Pattern Image

    Sample Texture Image
    Sample Stencil Image
  7. Flow- This helps in setting the distance between brush impressions.
  8. Brush Type - Dry or wet . You can create a dry or wet brush effect using this option.
  9. See below for some of the brush strokes created on the paint doodler app.   

Pencil Tool Options and Steps

  1. Pencil Select box- This option allows you to choose various types of drawing styles
    • Ribbon
    • Circle
    • Fur
    • Grid
    • Long Fur
    • Shaded
    • Simple
    • Sketchy
    • Squares
    • Chrome
    • Web
  2. Opacity - This allows to choose the transparency level of the stroke. Opacity 100 means brush stoke is opaque. Opacity 0 means that brush stoke is completely transparent.
  3. Softness - This creates soft brush edges by creating a color gradient. Softness 0 mean that brush edges are of the same color as center of the brush. 100 means that brush edges are more transparent than the centre.
  4. Size - This helps in setting the size of the brush.
  5. Fill - You can apply texture (over 30), patterns(30) or create a stroke using stencils(over 10).
  6. See below for some of the brush strokes created on the paint doodler app.   

Notes
  1.  You must click on an adjacent textbox to apply changes.
  2. All measurements are in pixel.
  3. Pen and brush tools can be used only on static canvas please visit http://paintdoodler.blogspot.co.uk/2013/04/overview.html for brief description on canvas. 
  4. Image can be saved by choosing menu File-> Save. All canvas layers will be merged from top to bottom. In order save to hard disk right click the generated image and choose "save image as".

How to merge canvas on paint doodler


Prerequisite


  1. Basic understanding of paint doodler interface http://paintdoodler.blogspot.co.uk/p/paint-doodler-user-interface.html
  2. Basic understanding of the paint doodler layer architecture  http://paintdoodler.blogspot.co.uk/p/layer.html
  3. For tutorials visit http://paintdoodler.blogspot.co.uk/2013/05/index.html

Setup Steps

  1. Logon to paint doodler website by opening http://www.paintdoodler.com  in your browser. Login by clicking Facebook,Twitter, or Google + icons on the home page. You will be presented with a screen. showing text "The Paint Doodlder is Loading. Please visit some of the tutorials below while it loads..." followed by "Paint Doodler is Ready Click here to continue". Click on this text to start working on the app.

Merge Up

Select the appropriate canvas layer from the navigator. Click on Layer|Merge With Top to merge selected to the canvas layer with top layer. Select appropriate merge option from the tool control option.
Following options are available to merge

Merge All

Click on Layer|Merge All to merge selected to the canvas layer with top layer. Select appropriate merge option from the tool control option. 


Notes

  1. Canvas layers can be found under Navigator-> Layer tab. Canvas layer that is at the bottom is the top most layer.
  2. Merge operation can be performed on static canvas i.e. underlying or source canvas can be either static or dynamic canvas but destination canvas must be a static canvas.

How to save image on paint doodler


Prerequisite


  1. Basic understanding of paint doodler interface http://paintdoodler.blogspot.co.uk/p/paint-doodler-user-interface.html
  2. Basic understanding of the paint doodler drawing layer architecture  http://paintdoodler.blogspot.co.uk/p/layer.html
  3. For tutorials visit http://paintdoodler.blogspot.co.uk/2013/05/index.html

Setup Steps

  1. Logon to paint doodler website by opening http://www.paintdoodler.com  in your browser. Login by clicking Facebook,Twitter, or Google + icons on the home page. You will be presented with a screen. showing text "The Paint Doodlder is Loading. Please visit some of the tutorials below while it loads..." followed by "Paint Doodler is Ready Click here to continue". Click on this text to start working on the app.
Steps to save image


  1. From the file menu chose save. All the layers including background are merged into a single image.
  2. Right click the generated and choose "Save Image As"  to save it to hard disk. File dialog will allow user to save image in png format.

Notes

  1. Background is considered as bottom most drawing layer and  all the rest drawing layer are ordered as per the  order shown on navigator-> layers tab.
  2. While merging the canvas source over merge option is used. Please refer tutorial on merge option at http://paintdoodler.blogspot.co.uk/p/layer.html


How to perform simple transform on paint doodler


Prerequisite


  1. Basic understanding of paint doodler interface http://paintdoodler.blogspot.co.uk/p/paint-doodler-user-interface.html
  2. Basic understanding of the paint doodler drawing layer architecture  http://paintdoodler.blogspot.co.uk/p/layer.html
  3. How to select image on paint doodler http://paintdoodler.blogspot.co.uk/p/image-selection.html
  4. For tutorials visit http://paintdoodler.blogspot.co.uk/2013/05/index.html

Setup Steps

  1. Logon to paint doodler website by opening http://www.paintdoodler.com  in your browser. Login by clicking Facebook,Twitter, or Google + icons on the home page. You will be presented with a screen. showing text "The Paint Doodlder is Loading. Please visit some of the tutorials below while it loads..." followed by "Paint Doodler is Ready Click here to continue". Click on this text to start working on the app.
  2. Ensure that static canvas is the topmost canvas layer. Image transformation are performed only on top static canvas layer. 
Steps to perform image transformation

Image transformation can be broken down into three steps
  1. Image Selection
    • Following toolbar icons can be used for image selection
    • Polygon,Triangle,Circle and Rectangle
    • Please visit the tutorial for image selection at 
    http://paintdoodler.blogspot.co.uk/p/image-selection.html for details
  2. Freeze selection click on the following tool bar icon to freeze selection
  3. Transform Tool
  4. Resize Tranform Selection
    • Click on one of the  toolbar icons for image selection describe in step 1 to enable resizing of the frozen image selection.
    • Select individual image selectors on the drawn canvas layer as shown in the video. Resize using the drag handles or providing appropriate length, width, shear on the tool controls.
    • Continue resizing,transforming selectors until you have created place holder for transformed shape.
    • Click on the following icon on the tool controls (last icon on the right handside) to apply the transformation.
    • ApplyTransform

Notes

  1. In order to remove image selectors click on the reset icon in tool box
    reset  tool
  2. When resizing shapes using the text boxes click on one of the adjacent text boxes to apply the resize. Clicking anywhere on the canvas will cause the selected image to be deselected and change will not be appied
  3. Images shapes (Rectangle, Square, Line, Bezier, Polygon, Image, Triangle  ) are placed on dynamic canvas which allows for simple resize,translate and shear transforms through the tools control. Please see below for the icons that can be used for the 

  4. Line, Bezier Curve, Polygon, Rectangle, Triangle, Circle,  Image

  5. In order to apply complex transformation on drawing  through the image selector tools described above  you would need to merge the dynamic with top most static canvas.. Please refer to the blog post on merging canvas at http://paintdoodler.blogspot.co.uk/2013/06/how-to-merge-canvas-on-paint-doodler.html
  6. Image selection tools are different from the tools used for using dynamic selectors. Please notice a  tick at the bottom of the icon used for image selection.
  7. While merging the canvas source over merge option is used. Please refer tutorial on merge option at http://paintdoodler.blogspot.co.uk/p/layer.html

Paint Doodler Canvas Management


Prerequisite

1. Basic understanding of paint doodler interface http://paintdoodler.blogspot.co.uk/p/paint-doodler-user-interface.html
2. For tutorials visit http://paintdoodler.blogspot.co.uk/2013/05/index.html

Steps

  1. Logon to paint doodler website by opening http://www.paintdoodler.com  in your browser. Login by clicking Facebook,Twitter, or Google + icons on the home page. You will be presented with a screen. showing text "The Paint Doodlder is Loading. Please visit some of the tutorials below while it loads..." followed by "Paint Doodler is Ready Click here to continue". Click on this text to start working on the app.
  2. Go to Menu item Image->Canvas to manage canvas.
  3. Change Canvas size, grid space and background using tool control options below the menu items as demonstrated in the video.
  4. To change the grid space eneter a numeric value in the text box next to "Grid Space".  
  5. To change grid color select a color from the color input next to grid space. 
  6. To remove grids remove the numeric value from the grid space text box or set it to 0.
  7. To change background color select background color and choose appropriate color from the color input.
  8. To make background transparent select Transparent option from the drop down.

Notes

  1.  You must click on an adjacent textbox to apply changes.
  2. All measurements are in pixel.
  3. Paint doodler canvas is bottom most layer. Grid space and grid color are moved when saving the image.
  4. Image can be saved by choosing menu File-> Save. All canvas layers will be merged from top to bottom. In order save to hard disk right click the generated image and choose "save image as"

How to make image transparent on paint doodler


Prerequisite


  1. Basic understanding of paint doodler interface http://paintdoodler.blogspot.co.uk/p/paint-doodler-user-interface.html
  2. Basic understanding of the paint doodler drawing layer architecture  http://paintdoodler.blogspot.co.uk/p/layer.html
  3. For tutorials visit http://paintdoodler.blogspot.co.uk/2013/05/index.html

Setup Steps

  1. Logon to paint doodler website by opening http://www.paintdoodler.com using latest web browser. Login by clicking Facebook,Twitter, or Google + icons on the home page. You will be presented with a screen. showing text "The Paint Doodler is loading. Please wait" followed by "Paint Doodler is Ready Click here to continue". Click on this text.
  2. Paint Doodler page starts with a pop up screen showing start up tutorials. You can start working on Paint Doodler App by clicking on the text Click here to start.
  3. Ensure that static canvas is the topmost canvas layer. Image transformation are performed only on top static canvas layer. 

Steps to make image transparent.

On paint doodler app you can use magic wand tool shown in image below to make image transparent. Magic wand tool select all the area on canvas which have the same color attribute as the underlying selected pixel.  
Magic wand
  1. Select the magic wand tool from the tool box. Set the threshold level for red green blue and alpha for image. 
  2. Click the background using the magic wand tool.
  3. From the menu Edit|Cut to remove the background

Notes

  1. In order to remove image selectors click on the reset icon in tool box
    reset  tool
  2. In order to use magic wand on drawing created  through the dynamic tools described above  you would need to merge the dynamic with top most static canvas. Please refer to the blog post on merging canvas at http://paintdoodler.blogspot.co.uk/2013/06/how-to-merge-canvas-on-paint-doodler.html


How to add text to drawing images on paint doodler app


How to use paint doodler
http://www.paintdoodler.com

How to blend two drawing layers on Paint Doodler


How to use paint doodler
http://www.paintdoodler.com

How to remove red eye on Paint Doodler Image editing and drawing applica...


How to use paint doodler
http://www.paintdoodler.com