Prerequisite
1. Basic understanding of paint doodler interface http://paintdoodler.blogspot.co.uk/p/paint-doodler-user-interface.html
2. For tutorials visit http://paintdoodler.blogspot.co.uk/2013/05/index.html
Setup Steps
- Logon to paint doodler website by opening http://www.paintdoodler.com in your browser. Login by clicking Facebook,Twitter, or Google + icons on the home page. You will be presented with a screen. showing text "The Paint Doodlder is Loading. Please visit some of the tutorials below while it loads..." followed by "Paint Doodler is Ready Click here to continue". Click on this text to start working on the app.
- Select appropriate color from the color input box from the tool box. Color box can be found at the bottom of the tool box.
- To start using brush choose following Brush tool icon from the tool Box.
- To start using pencil choose Pencil tool icon from the tool Box.
 |
| Brush Tool |
 |
| Pencil Tool |
Brush Tool Options and Steps
On choosing brush tool you are presented with following options in tool controls under menu.
- Brush Select box- This option allows you to choose various types of brush shapes
- Round
- Square
- Free Hand - When choosing this option you have an additional option of select brush length
- Tube - This option is quite useful when you are trying to draw hair, grass etc. It uses Bézier curve to draw tube like structure along the stroke path.
- Opacity - This allows to choose the transparency level of the stroke. Opacity 100 means brush stoke is opaque. Opacity 0 means that brush stoke is completely transparent.
- Softness - This creates soft brush edges by creating a color gradient. Softness 0 mean that brush edges are of the same color as center of the brush. 100 means that brush edges are more transparent than the centre.
- Size - This helps in setting the size of the brush.
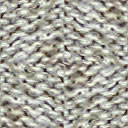
- Fill - You can apply texture (over 30), patterns(30) or create a stroke using stencils(over 10). You can select stencils, patterns and textures from your local file system. Stencil must have white background. Pattern and textures do not have any such limitation. Images used for patterns are blended with drawing. Images used for textures are applied over the draw transparency level of textures.
- To select local textures, patterns from local file system choose fill type from control menu. Make sure you must select none from the select option next to fill type. Use select file input to choose local image.

Sample Pattern Image 
Sample Texture Image 
Sample Stencil Image - Flow- This helps in setting the distance between brush impressions.
- Brush Type - Dry or wet . You can create a dry or wet brush effect using this option.
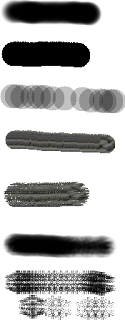
- See below for some of the brush strokes created on the paint doodler app.
Pencil Tool Options and Steps
- Pencil Select box- This option allows you to choose various types of drawing styles
- Ribbon
- Circle
- Fur
- Grid
- Long Fur
- Shaded
- Simple
- Sketchy
- Squares
- Chrome
- Web
- Opacity - This allows to choose the transparency level of the stroke. Opacity 100 means brush stoke is opaque. Opacity 0 means that brush stoke is completely transparent.
- Softness - This creates soft brush edges by creating a color gradient. Softness 0 mean that brush edges are of the same color as center of the brush. 100 means that brush edges are more transparent than the centre.
- Size - This helps in setting the size of the brush.
- Fill - You can apply texture (over 30), patterns(30) or create a stroke using stencils(over 10).
- See below for some of the brush strokes created on the paint doodler app.
Notes
- You must click on an adjacent textbox to apply changes.
- All measurements are in pixel.
- Pen and brush tools can be used only on static canvas please visit http://paintdoodler.blogspot.co.uk/2013/04/overview.html for brief description on canvas.
- Image can be saved by choosing menu File-> Save. All canvas layers will be merged from top to bottom. In order save to hard disk right click the generated image and choose "save image as".


No comments:
Post a Comment